Making a statement with your bread can be as simple as shaping a concha dough into a heart or creating a bread sculpture that exemplifies the full scope of your artistic abilities to loyal customers. Bakery consumers love to see something new, and they will buy more products from your bakery when they are inspired by your creativity.
Other examples include concha cupcakes (concha dough shaped into a cupcake in a paper baking cup) or turtle-shaped pan dulce that can be egg-washed on the outside to add a shiny glaze.
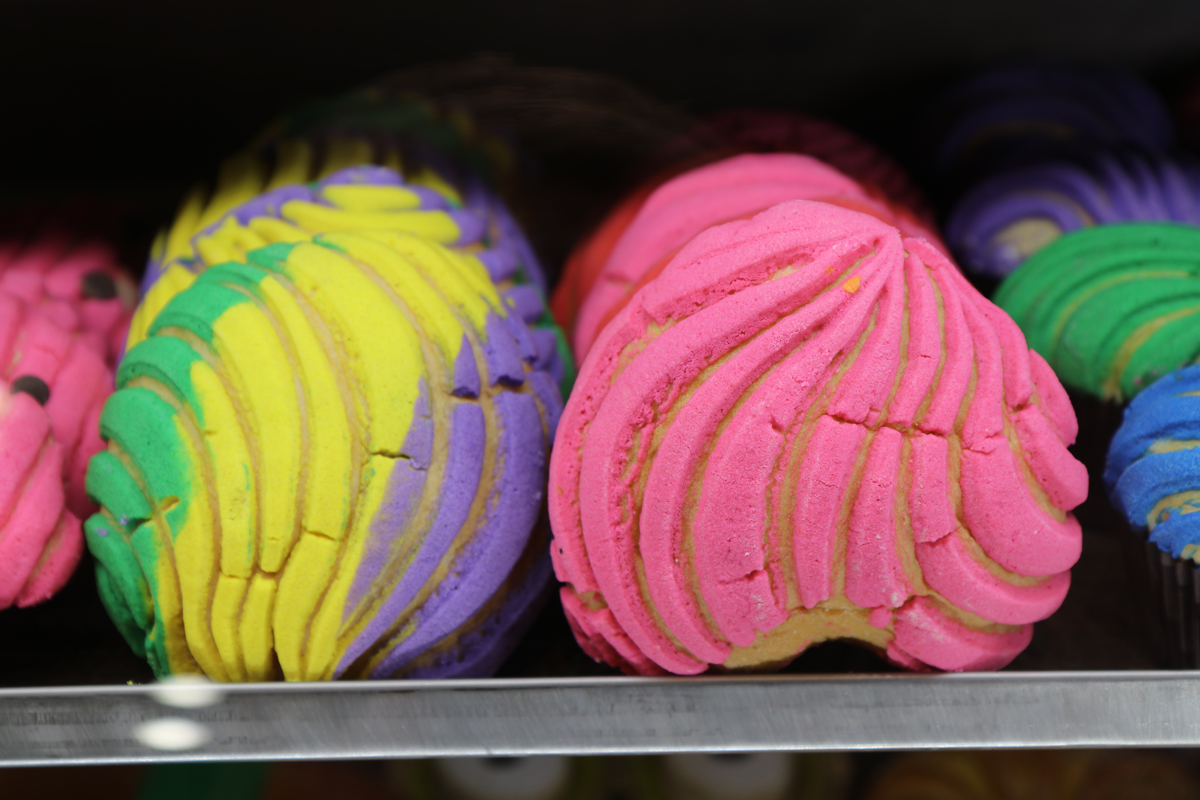
Fernando Duque, co-owner of Tierra Caliente, which has nine bakery locations in Houston, says shaping concha dough can be done with ease using a scraper to form the dough into any shape you prefer. Then add colorful dough pieces on top and bake to create a special product for holidays such as Valentine’s Day or anniversary parties.
“We did a special purple concha for Selena’s anniversary that we called Como la Flor,” Duque says, referring to the song title made famous by Selena, who is celebrated by many Hispanics every year on March 31, the anniversary date of her death.
Tierra Caliente also makes unicorn conchas adorned in bright, unicorn colors (purple, pink, blue), as well as manteconchas, the Hispanic sweet bread hybrid that combines concha dough with mantecada dough. Most often, manteconchas are made by forming concha dough on top of the mantecada dough prior to baking.
At El Bolillo Bakery, bakers create unique shapes of breads and donuts inspired by unicorns, turtles, ropes and shells.
“We allow our bakers the creative freedom to have fun and make new products,” says Kirk Michaelis, owner of El Bolillo Bakery, which has three locations in Houston. “We thrive on that creativity. They are proud of their work, and creativity is contagious.”
Bread-shaping techniques
The most apparent effect of shaping bread is how the bread looks. Through shaping you can change what your bread looks like. It can be a simple rustic ball or a more elaborate braided bread. Shaping has been used by bakers for centuries. It is a convenient way to distinguish between different bread doughs after baking and helps customers choose their bread.
Before you shape the dough, you’ll want to pre-shape it first. There are two basic pre-shapes. The first is a basic oval or rectangle. The second, a round, is exactly the same as making a round loaf.
For shaping, use just enough flour on your hands to keep them from sticking but avoid using too much, as this can incorporate unwanted raw flour into the dough. If your hands do begin to stick, slide them along the bench to gather a dusting of flour.
Just as the amount of flour on your hands is important, so too is the flour on the bench. The key to shaping bread dough is to rely on the bench to slightly tug on the dough as you drag it across. If you use too much flour, the dough will slide too easily, never able to develop sufficient tension.
The surface of the dough should not tear when shaping. This tearing can be caused by too short of a bench rest or by handling too forcefully. If the dough does begin to tear, use a lighter hand when pushing, pulling, and folding the dough.
Lightly dust the bench with flour and flip the pre-shaped round onto the flour. Grab the bottom of the dough with two hands and fold it up in half. Then, using both hands with thumbs pointing up, pick up the dough at one side and gently fold it over, about in half, with the seam of the dough facing away from you. As you fold it over also gently pull the dough toward you, tightening the outside skin.
Repeat this pickup-and-tuck a few more times, with a quarter rotation each time, until the dough is gathered up. Then, let the loose round rest in front of you with the seam down on the bench.
Place two hands over the dough so your thumbs are close to each other and your hands and fingers encase the dough. Move your hands together in a circular motion, pushing the dough with one hand toward the other as it’s tightened between your hand and the bench.
Continue this circular motion until you form the dough into a uniform, taut ball. Using a bench knife, transfer the dough to a proofing basket, seam side up, for the final rise.
