|
1. Mix batches of violet, pale red, black, and teal piping gel using Premium Gel Colors.
2. Prepare candy geodes:
- Create molds using parchment cut into circles (or large cupcake liners) by cutting large fringe into the edges and folding fringed flaps upward. Walls of mold should be at least ½” tall. Create center holes in the same way, if desired.
- Crush pieces of hard candy into a medium grain.
- Spray molds with non-stick spray and line a pan with parchment.
- Arrange molds on pan, fill with crushed candy pieces, and bake for approximately 4 minutes at 300 degrees.
- When candy begins to melt, remove from oven. Press extra candy chunks into melting candy for added texture. Allow to cool for a very short time.
- While candy is still pliable, remove from mold and adjust shape with your hands, being careful not to burn your fingers!
- For extra dimension, use a food grade brush to apply gold shimmer airbrush to each geode ring.
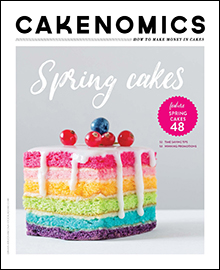
3. Fill, assemble and ice the cakes.
4. Apply Designer Prints® strips around each cake, as shown.
5. Apply a thin, color-coordinated layer of piping gel atop each cake. TIP: Streak a very small portion of black gel into each layer, to create a marbled effect.
6. Arrange candy geodes as you wish, using toothpicks to prop up if needed.
Decorating idea by Charra Jarosz, courtesy of Luck's Food Decorating Company